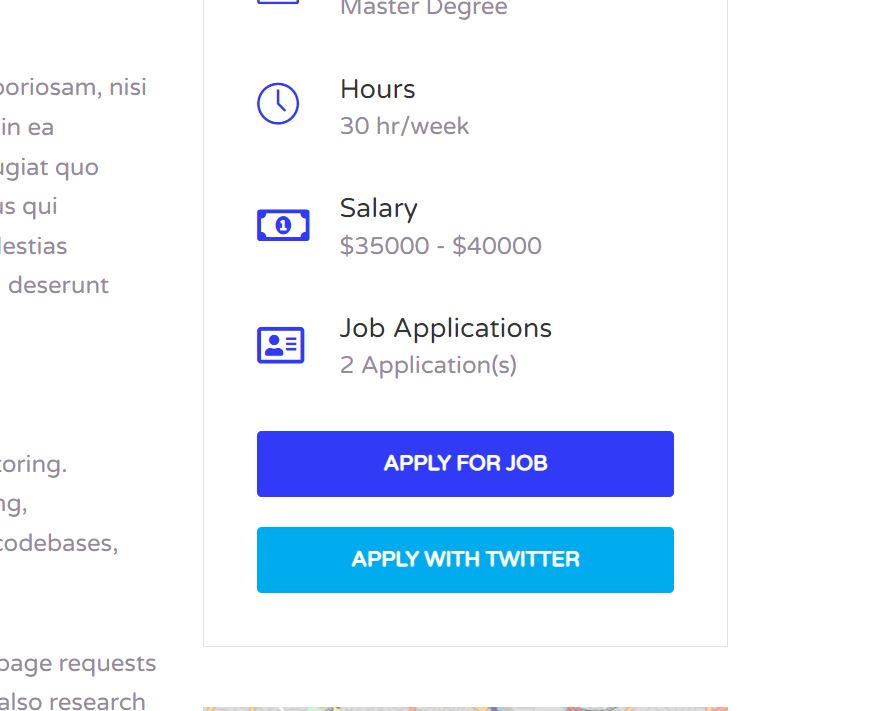
This is a functionality that extends the WP Job Manager – Applications add-on and adds applications via Twitter Account.
Note: Without the Applications plugin you will NOT be able to use this feature.
Creating Twitter App
First make sure to apply for a Developer account via the Twitter Developer website, they will ask you to verify your account once you have applied. You can continue once your developer account is ready and verified.
Step 1 – Go to the Twitter Developer Portal -> Projects & Apps and click on Add App to create a new app for your Twitter Applications.
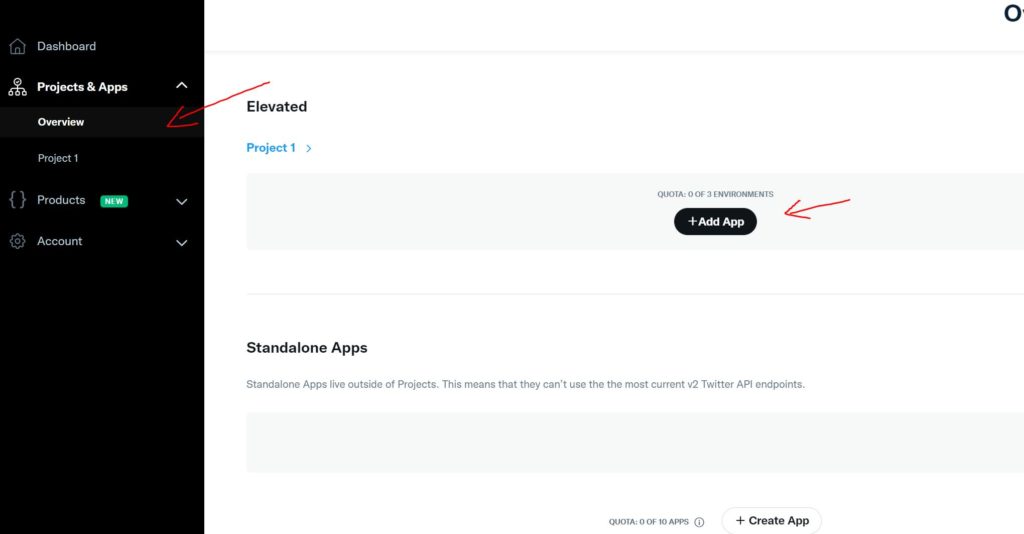
Step 2 – Select one of the 3 App environments (Development, Staging, Productions) depending on your use and click next.
Step 3 – Enter your App’s Name and click next.
Step 4 – Your Keys & Tokens will be generated. You can skip saving the key for now and click on App Settings.
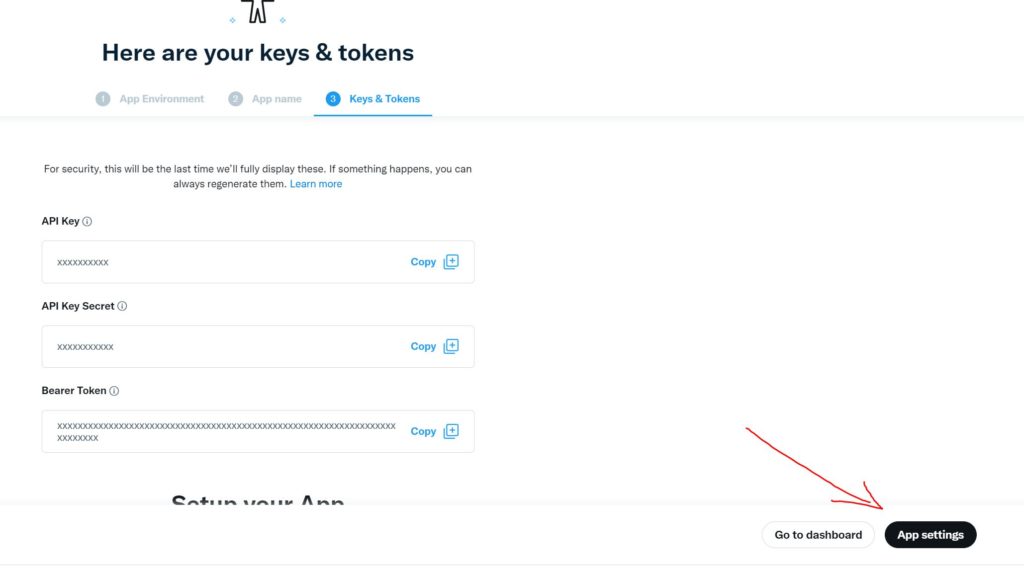
Step 5 – You will be redirected to your App’s page. Click on Set up under User authentication settings.

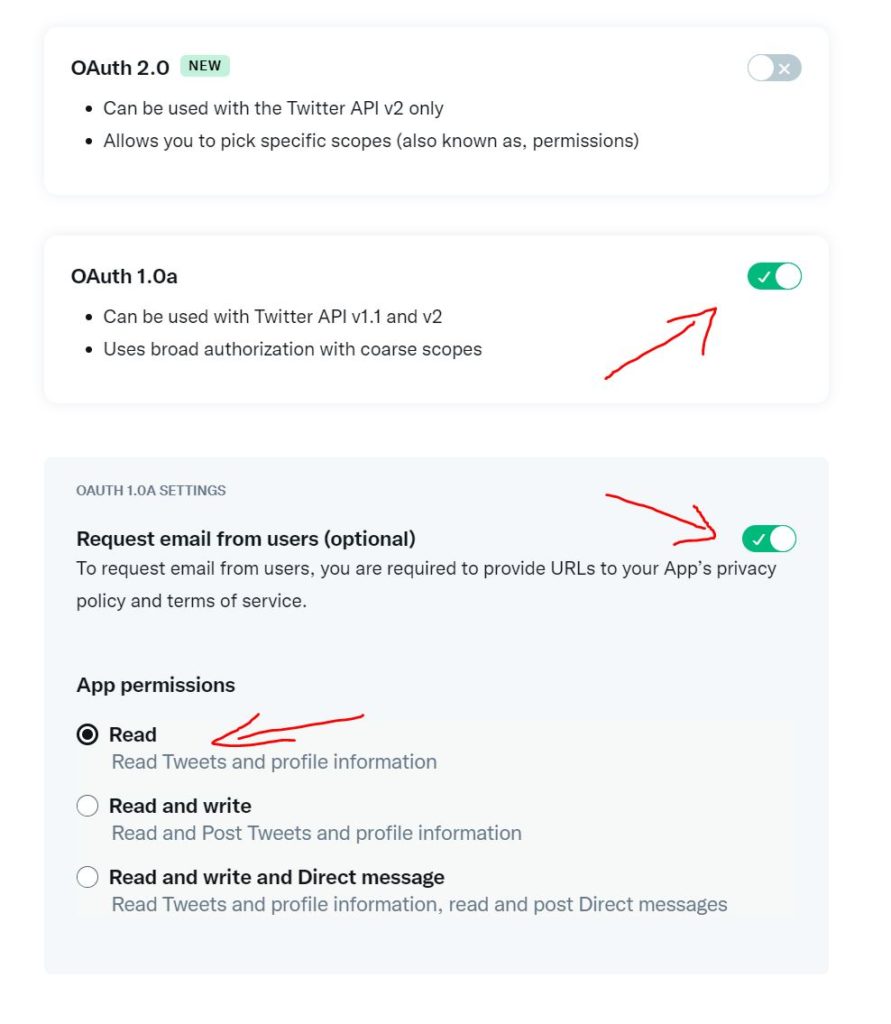
Step 6 – Activate oAuth 1.0a, enable Request email from users (optional), set App Permissions to Read and fill all the required General Authentication Settings and click on save.
Callback URI / Redirect URL should be your home page URL.
Make sure your URL has a “/” at the end, otherwise it will not work and Twitter will show a “broken page”.
Example: https://my-site.com/
Step 7 – After saving you will be redirected on your App’s page. Click on Key and Tokens.
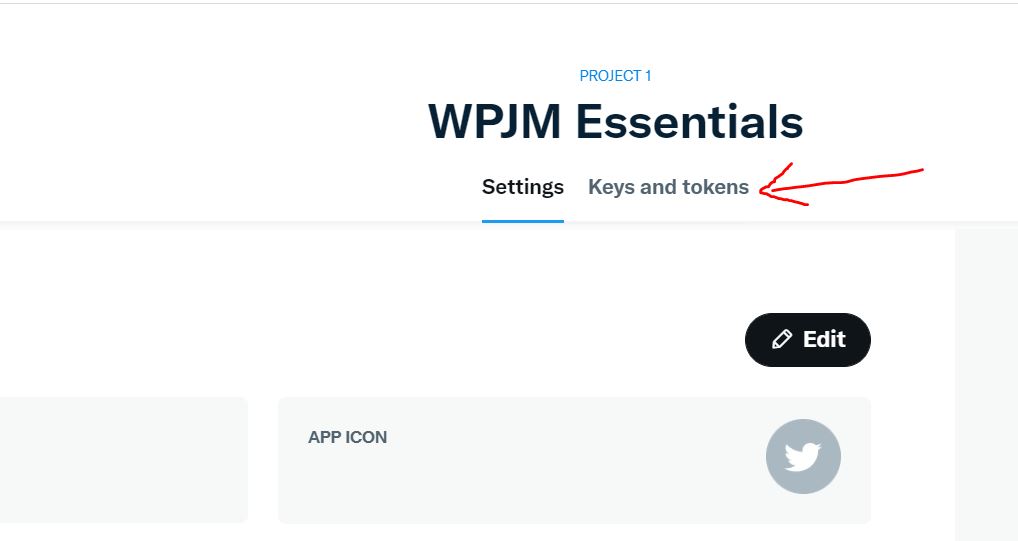
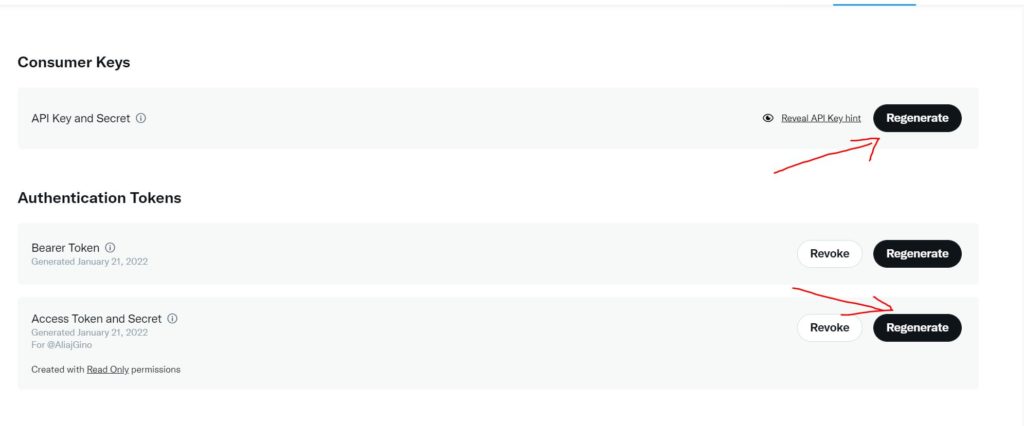
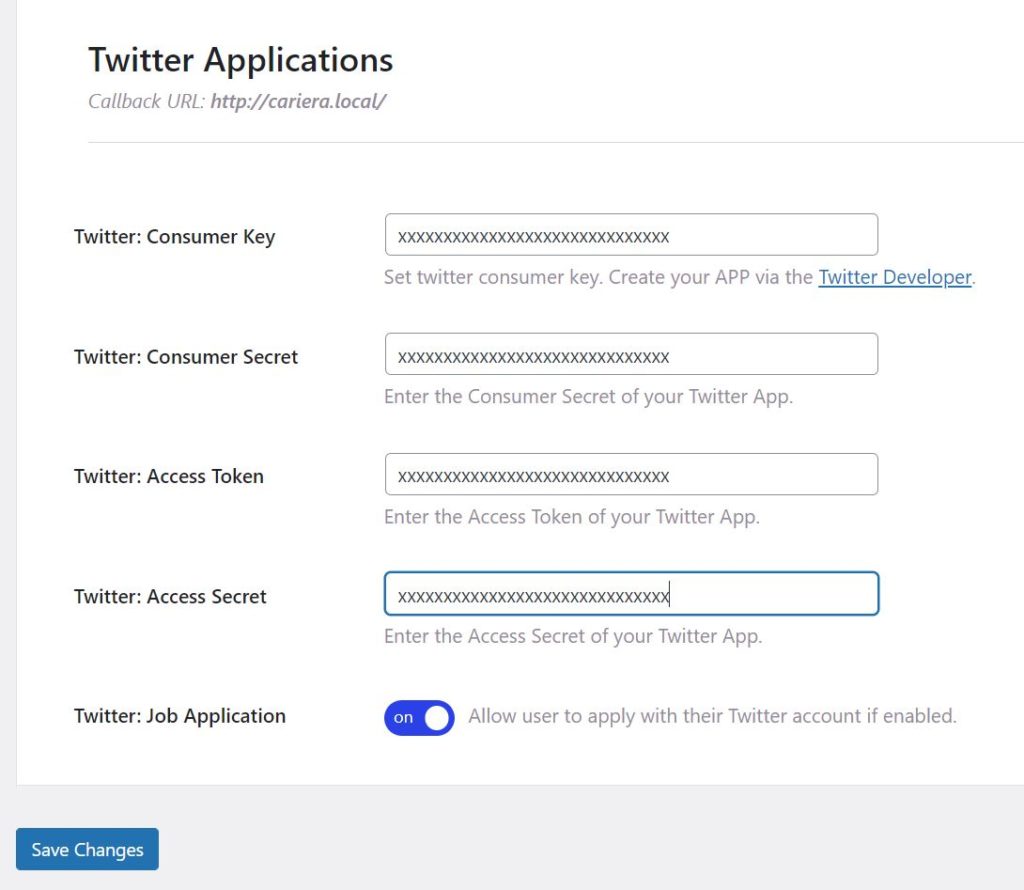
Step 8 – Regenerate Consumer Keys and save them on a text file, do the same for Access Token and Secret. These keys and tokes will be added in the plugin’s settings as shown below.
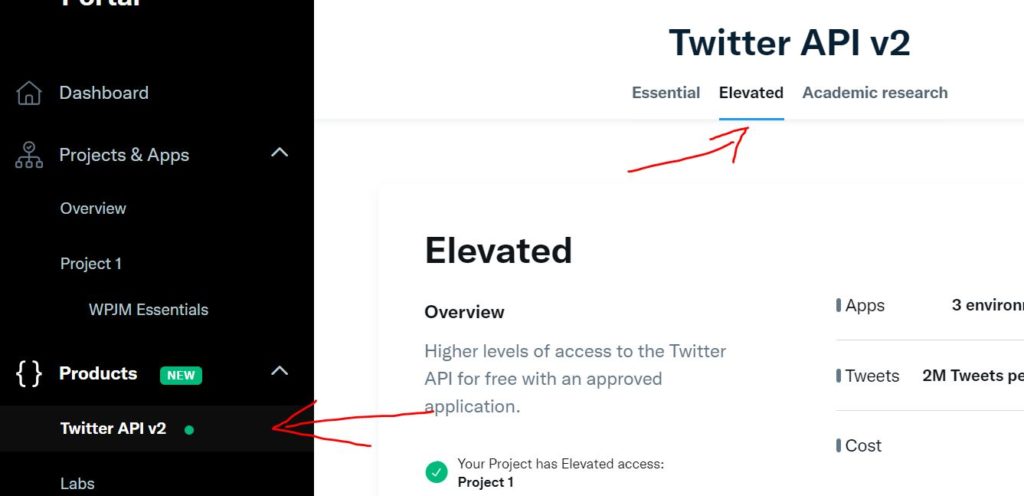
There is one more step that needs to be taken in order to have fully access to the twitter api. Go to “Products -> Twitter API v2 -> Elevated” and apply for Elevated access. It will ask you to fill out a form which is very simple and your access will be granted once the form has been filled and successfully submitted.
Configuring Plugin Settings
Go to “WP Dashboard -> Job Listings-> Essential Settings -> Applications”, paste in all the credentials that you saved in Step 8 in their matching input fields and click on Save Changes.
If you have followed all the steps as following you should now have a Apply with Twitter button on each single job page as shown in the image above.
