What is a Webhook?
Webhooks are one way that apps can send automated messages or information to other apps. It allows you to send real-time data from one application to another whenever a given event occurs. It’s how PayPal tells your accounting app when your clients pay you, how Twilio routes phone calls to your number, and how WooCommerce can notify you about new orders in Slack.
Why should I use Webhooks?
With webhooks you can create your own process every time an active notification action get’s trigged. You can send SMS, Emails, Push Notifications and so much more.
Zapier is one of these platforms that offers more than 3000 apps that can be used once your webhooks are configured.
How to set up Webhooks with Zapier?
Step 1: Create an account with Zapier. Once you have created and verified your new account, login to your account.
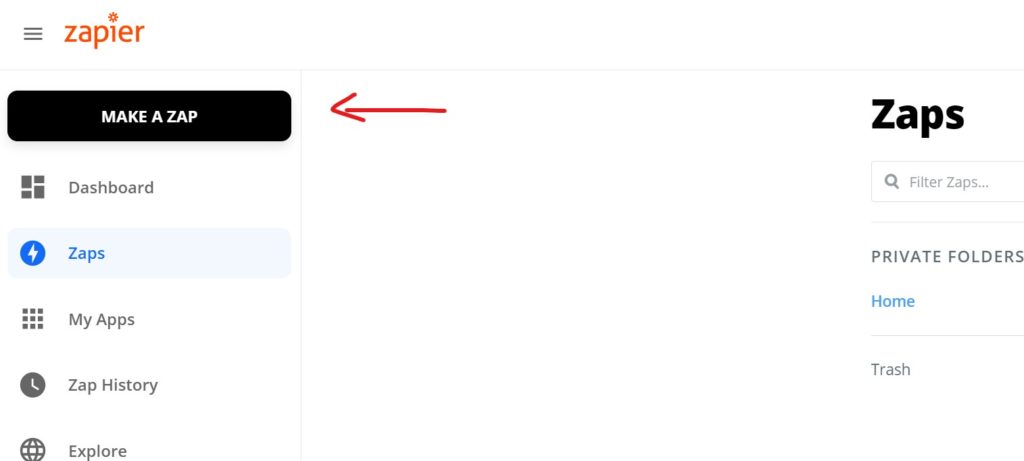
Step 2: From you dashboard create a new Zap, via the “Make a Zap” button
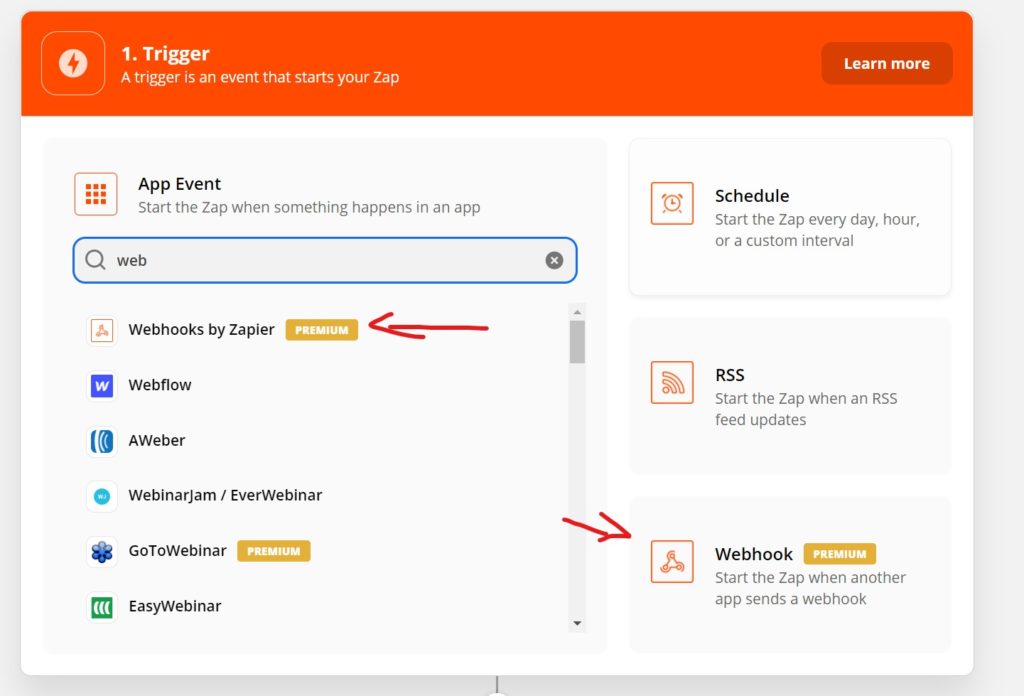
Step 3: Now you have to choose an App/Trigger for your new Zap what we need is Webhooks by Zapier. You can search for “Webhooks” or select it from the right side.
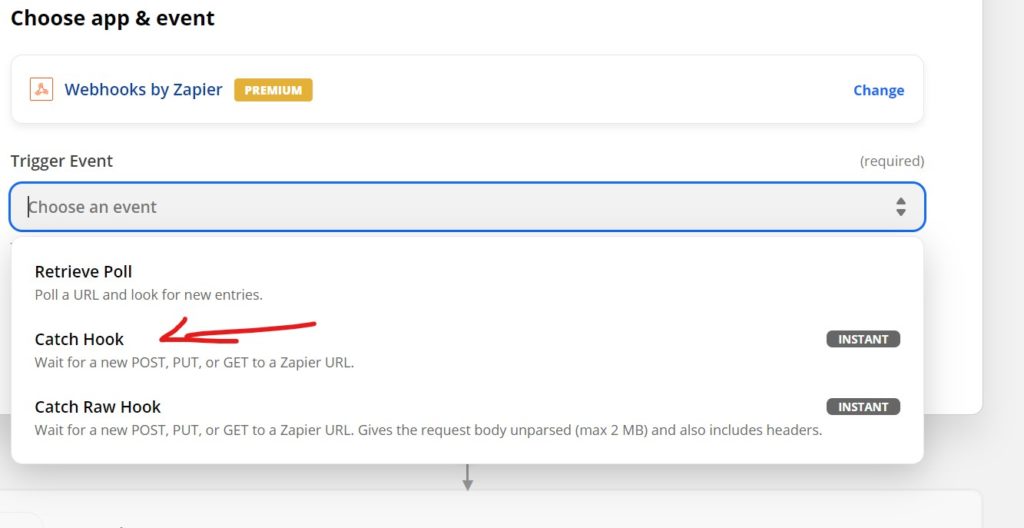
Step 4: You will have to choose a trigger event which is required to start a zap, select Catch Hook and click on Continue.
Step 5: You can skip this step and click on Continue.
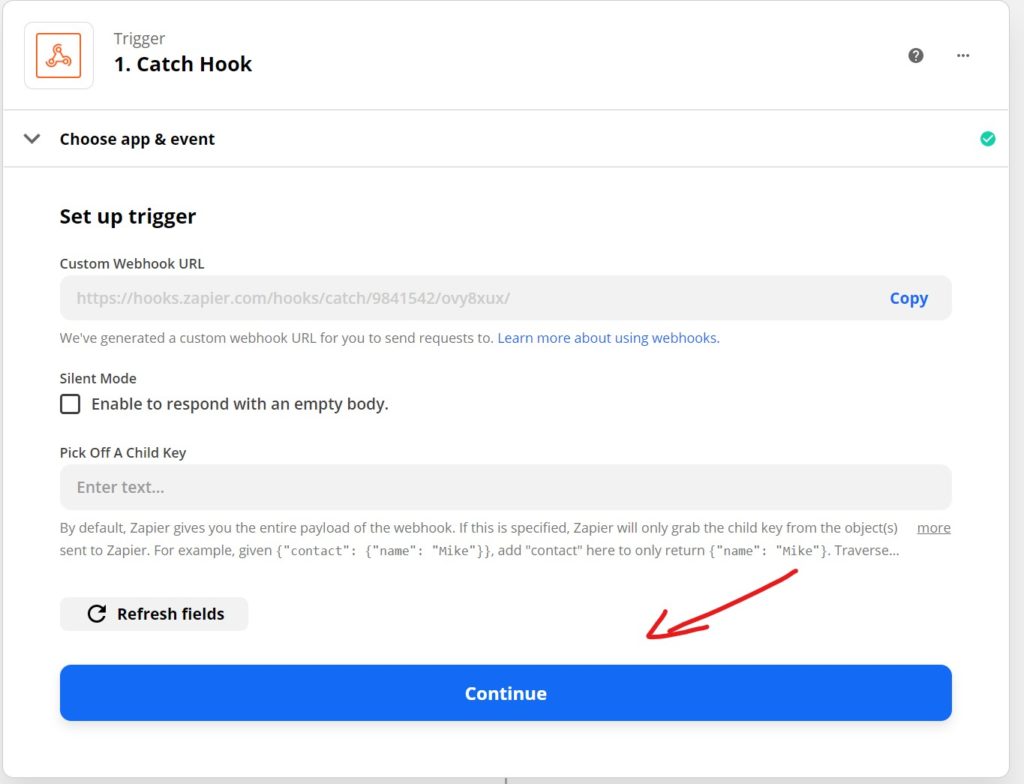
Step 6: Now you have to test your Trigger. You can copy you Custom Webhook URL from the previous step or from the current screen.
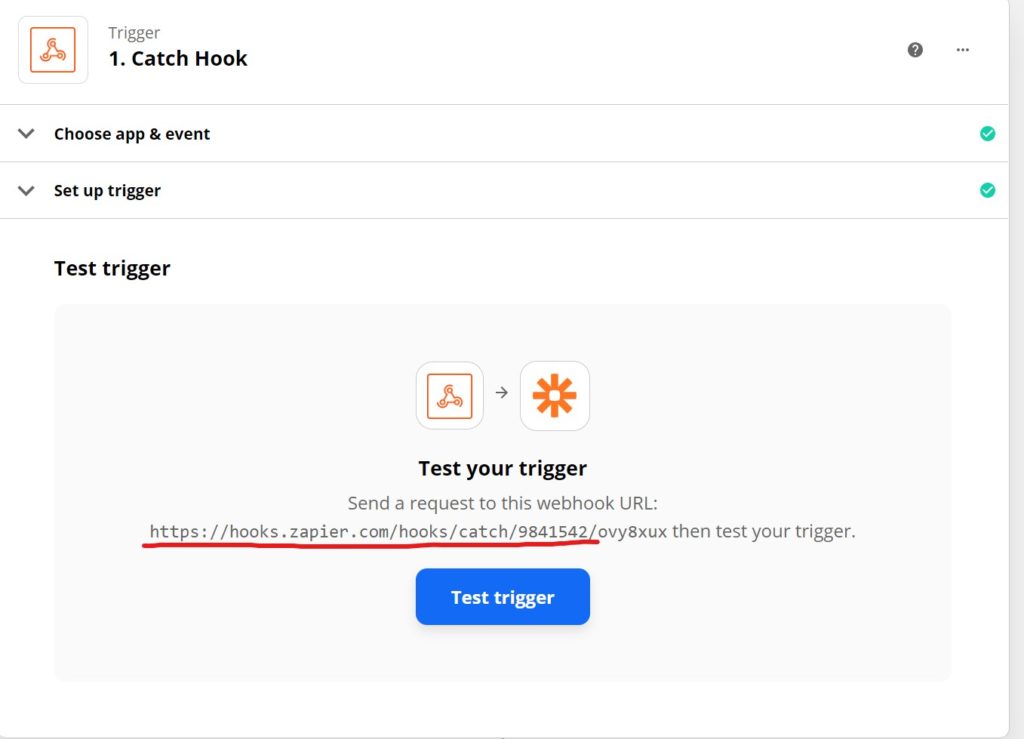
Now that you have copied your Custom Webhook URL from Zapier it’s time to configure it in the theme.
Step 7: In Cariera go to “WP Dashboard -> Cariera -> Settings -> Notifications”, enable the webhook switch on the notification that you want to configure webhooks, paste the Custom Webhook URL that we previously copy into the Webhook URL and Save Changes.
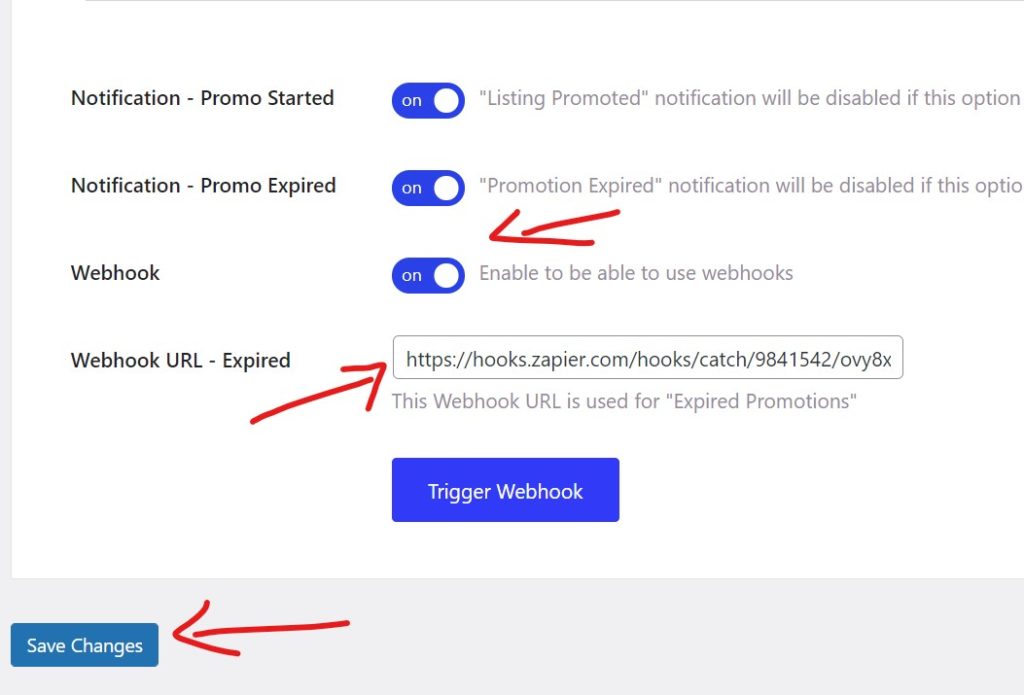
Step 8: Once the changes have been saved, click on the Trigger Webhook under the Webhook we activated on the previous step.
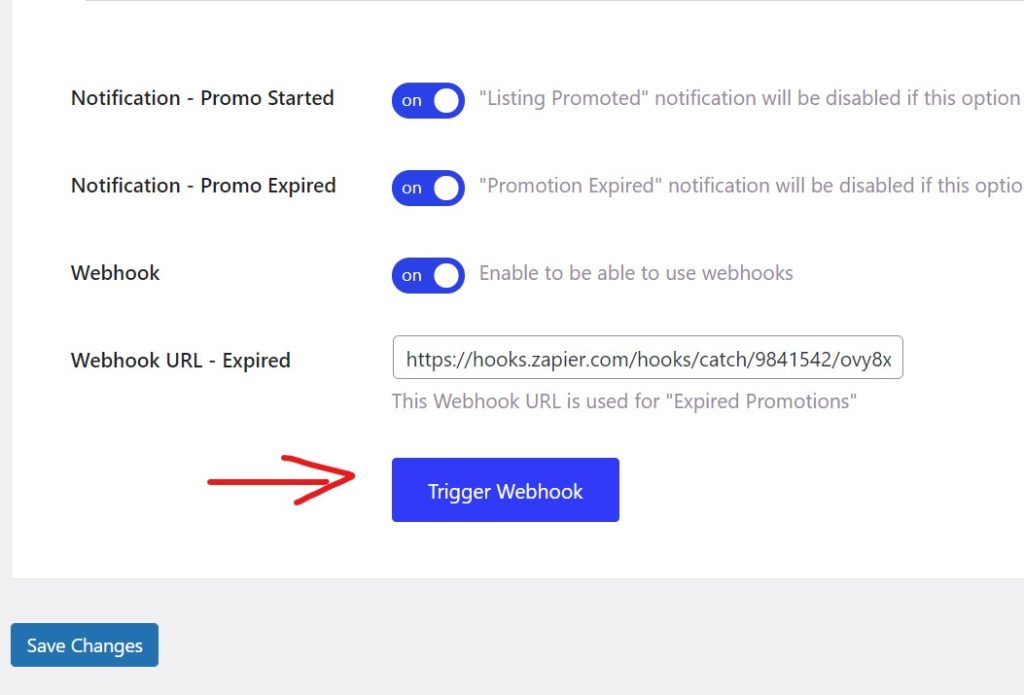
After clicking the Trigger Webhook your site will send the Webhook to Zapier, to confirm the hook we created. Now we have to go back to Zapier to confirm that everything is working.
If you are doing this on a local installation this will not work!
Step 9: Go back to where we left off in Zapier and click on Test Trigger. You should get a successful request with all the parameters that get sent from the site.
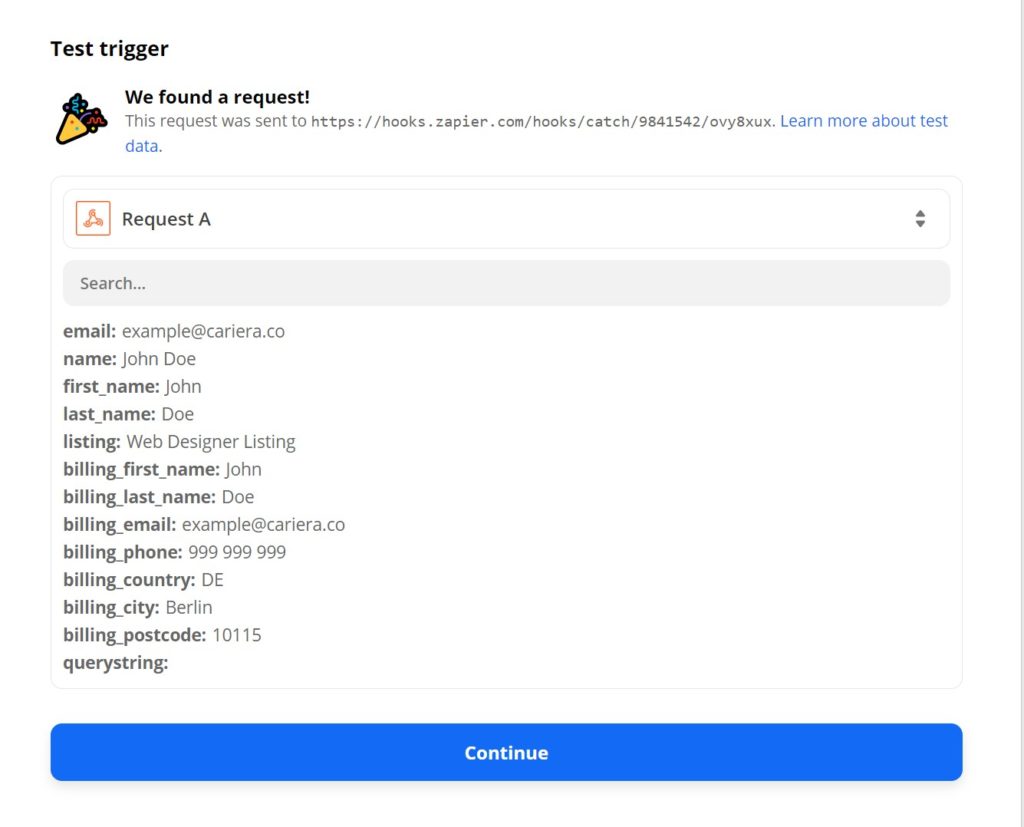
Step 10: Click on Continue.
Create an Action
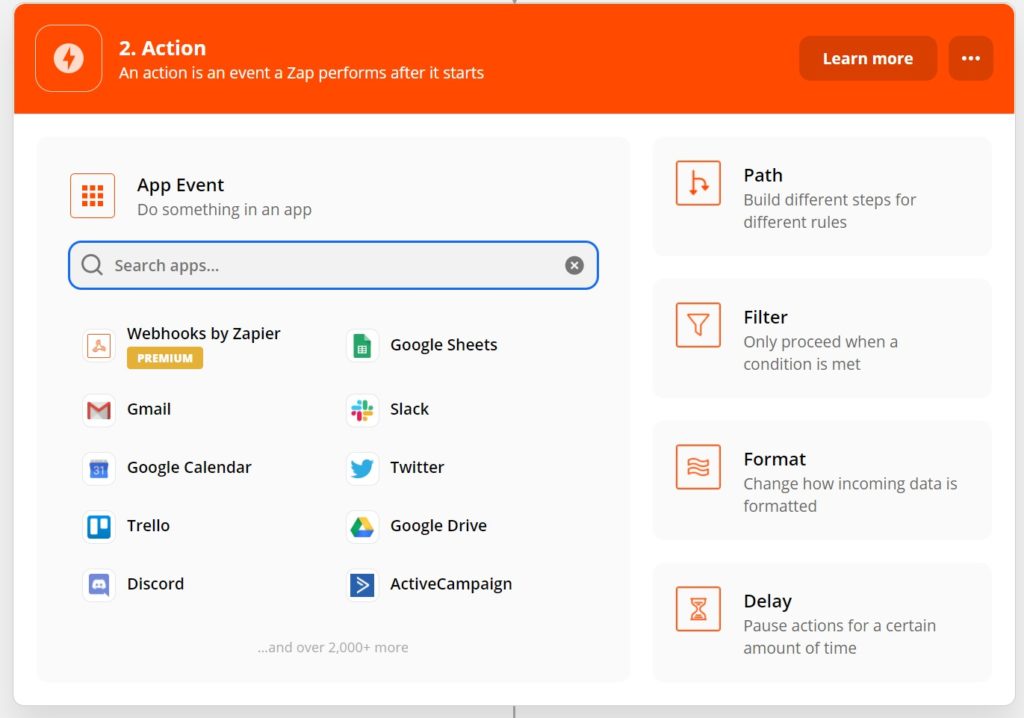
Now that we have confirmed that our Webhook works, you can create an action that will be performed every time our notification action get’s triggered.
In this example, every time a Listing Promotion expires, the Webhook will sent the data to Zapier and the actions that you have created for that Webhook will be performed.
You can choose between the 2000+ actions that Zapier provides, sending SMS, Emails, Push Notifications and much more.
You can learn more about how to use Zapier via their learning center: Zapier Learning Center